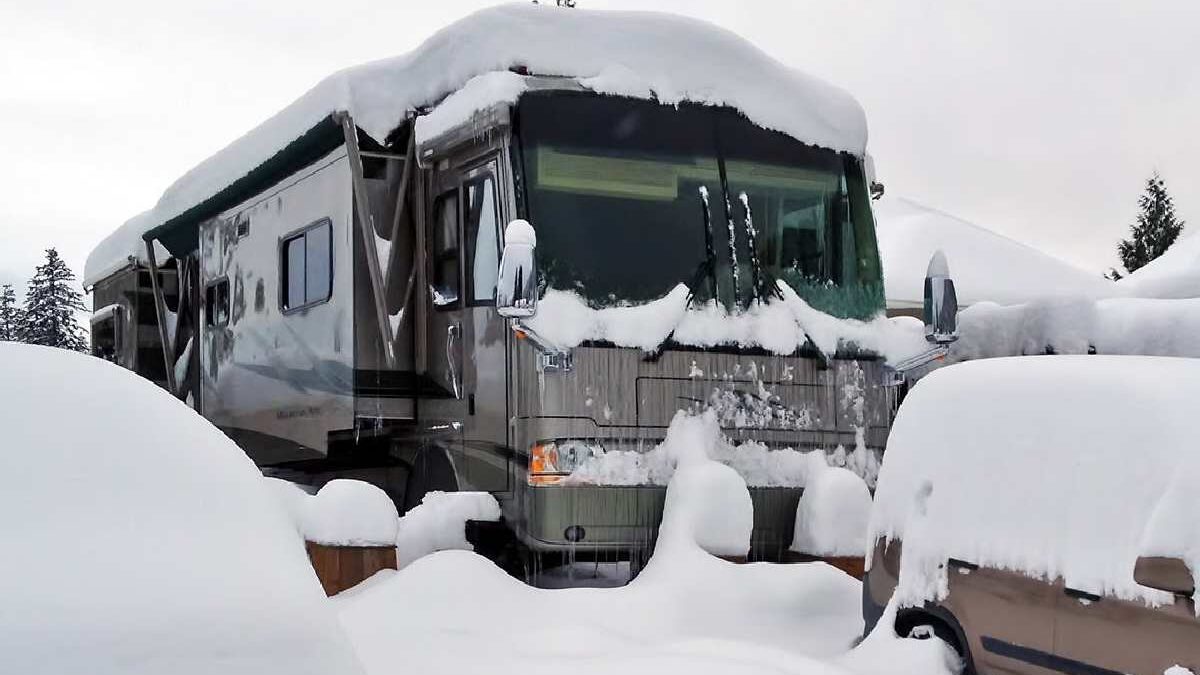
“Winter Freeze Your RV Dreams” highlights the challenges RV owners face when cold weather hits and how freezing temperatures can temporarily put travel plans on hold. Winter conditions can affect plumbing systems, batteries, tires, engines, and overall comfort, making RV travel more demanding and sometimes risky without proper preparation.
This concept focuses on:
- How freezing temperatures can damage RV water lines and tanks
- Why batteries, engines, and heating systems struggle in extreme cold
- The impact of snow, ice, and road conditions on safe RV travel
- The importance of winterization, insulation, and maintenance
Rather than ending the adventure, the winter freeze serves as a reminder that smart planning, seasonal care, and cold-weather readiness are essential to keep RV dreams alive year-round. With the right precautions, RV enthusiasts can either safely store their vehicles or adapt for winter-friendly travel and camping.
Table of Contents
What RV Dreams Mean
RV Dreams symbolize the aspiration to travel freely, live flexibly, and explore the world with the comfort of home on wheels. It’s about choosing experiences over schedules and turning roads, campgrounds, and scenic stops into everyday life moments.
Types of RV Dreams
| Type of RV Dream | Description | Ideal For |
| Weekend Getaways | Short RV trips taken over weekends or holidays | Working professionals, couples |
| Road Trip Adventures | Long-distance travel exploring multiple destinations | Travel lovers, explorers |
| Seasonal RV Living | Traveling according to weather (snowbirds) | Retirees, climate-conscious travelers |
| Full-Time RV Living | Living in an RV as a primary residence | Minimalists, retirees, digital nomads |
| Family RV Travel | RV trips focused on family bonding | Families with children |
| Solo RV Lifestyle | Independent travel and self-discovery | Solo travelers |
| Remote Work RV Life | Working online while traveling | Freelancers, digital nomads |
| Off-Grid RV Living | Staying in remote areas without hookups | Adventure seekers, nature lovers |
| Luxury RV Experience | High-end RVs with premium comfort | Luxury travelers |
| Budget RV Travel | Cost-effective RV trips with basic needs | Students, budget travelers |
Clean and Inspect Your RV
You should carry out a good cleaning to your RV before starting on the winterization process. This includes:
- Washing the exterior
- Cleaning the interior such as carpets and upholstery.
- Storage of all food materials so that pests are not attracted.
During cleaning, examine your RV in the case of any damage or wear and tear. Be careful about the roof, seals and windows. In case you have a Class B RV, you should not ignore the compact living spaces and look after them to make sure they do not have any mold or mildew. These problems can be resolved even before they are stored up to ensure they do not deteriorate throughout the winter seasons.
About Master the Art of Winterization
Master the Art of Winterization is all about learning how to properly protect your RV, camper, or vehicle from harsh winter conditions. When temperatures drop, water systems, engines, batteries, and interiors become vulnerable to freezing, cracking, and long-term damage. This concept focuses on prevention, preparation, and peace of mind.
At its core, winterization means:
- Safeguarding plumbing systems from frozen pipes and burst tanks
- Protecting engines and batteries from cold-weather failure
- Preserving interiors by preventing moisture, mold, and odors
- Extending the life of your RV or vehicle
- Reducing costly repairs once winter ends
Mastering winterization isn’t just for storage—it also helps those who travel in cold regions stay safe, warm, and functional throughout winter. With the right techniques, tools, and planning, winter becomes a manageable season instead of an RV-ending obstacle.
Winterization Fundamentals
| Aspect | Description | Purpose / Importance |
| Definition of Winterization | The process of preparing an RV for cold temperatures by removing water and protecting systems from freezing | Prevents structural and mechanical damage caused by ice expansion |
| Primary Objective | Eliminate or protect all water within RV systems | Avoids cracked pipes, damaged pumps, and tank failures |
| Key Temperature Trigger | Consistent temperatures below 40°F (4°C) | Ensures preparation occurs before freeze conditions begin |
| Core Systems Involved | Plumbing, water heater, holding tanks, appliances, seals | These components are most vulnerable to freeze damage |
| Water Removal | Draining fresh, grey, and black water tanks and low-point drains | Reduces the amount of water that can freeze inside the system |
| Plumbing Protection | Clearing water lines using air pressure or antifreeze | Prevents pipe bursts and valve damage |
| Water Heater Bypass | Isolating the water heater during antifreeze circulation | Reduces antifreeze usage and protects heater components |
| Antifreeze Type | RV-safe propylene glycol antifreeze | Non-toxic and safe for potable water systems |
| Common Winterization Methods | Antifreeze pump method and air compressor blow-out method | Allows flexibility based on climate severity and storage conditions |
| Fixture Coverage | Treating all faucets, toilets, showers, and exterior outlets | Ensures no trapped water remains in distribution points |
| Drain Trap Protection | Adding antifreeze to sink and shower drains | Prevents freezing and protects P-traps and seals |
| Storage Readiness | Final inspection and system shut-down | Affirms that RV is in good condition to withstand winter long term storage. |
RV Dreams – Country-Wise Overview
| Country | RV Culture Level | Popular RV Dream Style | Key Highlights |
| United States | Very High | Full-time RV living, Road trips | Huge RV parks, highways, national parks |
| Canada | High | Seasonal RV travel | Scenic routes, summer RV culture |
| Australia | High | Long-distance & off-grid RV life | Vast open roads, campervan popularity |
| New Zealand | High | Nature-focused RV travel | Freedom camping, eco-travel |
| Germany | High | Weekend & holiday RV trips | Well-organized campsites |
| France | High | Leisure & family RV travel | Motorhome tourism, scenic countryside |
| United Kingdom | Medium | Short RV & campervan trips | Compact routes, coastal travel |
| Japan | Low–Medium | Compact RV & campervan travel | Limited space, urban travel focus |
| India | Emerging | Luxury & adventure RV travel | Growing tourism, limited RV parks |
| South Africa | Medium | Wildlife & adventure RV trips | Safari routes, long scenic drives |
| Brazil | Low–Medium | Road-trip based RV travel | Developing RV infrastructure |
| UAE | Low | Luxury desert RV experiences | Premium RVs, niche tourism |
Step-by-Step RV Winterization Process
Gather Tools and Materials
Collect all necessary items: RV-safe propylene glycol antifreeze, an air compressor (30–50 psi), basic hand tools, a water heater bypass kit, and optional leak detection dye.
Drain the Fresh Water Tank
Open fresh water tank drain valve to drain off all the water. This prevents freezing damage of the tank.
Drain Grey and Black Tanks
Open the valves of the two tanks, and use them several times. This will remove all the water even the water in the lines or tanks.
Drain the Water Heater
Open the pressure relief valve and the drain plug to drain out the water heater. In case your RV has a water heater bypass, then fit it on to avoid the entry of antifreeze in the heater.
Blow Out Water Lines (Optional)
With the aid of an air compressor attached to the city water inlet, force the air via the plumbing lines. Have the pressure at 3050 psi and open each faucet until air only is released. This eliminates the lines of remaining water.
Introduce Antifreeze via the Pump Method
Turn on the RV water pump and pump the RV-safe antifreeze into the water system. Open all faucets (hot and cold lines) until there is antifreeze in them. Do not forget about the shower, toilet, and exterior faucets.
Protect Drains and Traps
Pour a small amount of antifreeze into each sink, shower, and toilet drain. This protects the P-traps and prevents freezing and damage to seals.
Check Appliances and Tanks
Make sure all water lines, toilets and drains are sealed. Make sure bypass in the water heater has been properly installed and antifreeze in the drains in the grey and black tanks.
Prepare the Exterior
Close roof vents, windows and any openings. Have you thought about using RV skirting on the bottom to minimize the airflow beneath the RV and cold exposure of tanks and plumbing.
Battery and Fuel Preparation
Take out batteries and keep them in a cool and dry place higher than 0. Charge them to the full before storing them. Fuel tank Fill the fuel tank and add stabilizer to stop condensation and degradation of the fuel.
Final Inspection
Check the RV to make sure that everything is winterized. Check drains, valves and faucets to ensure antifreeze is covered. Ensure that there is the proper closing of all the doors, vents, and openings.
Protect and Drain Water System
One of the most urgent processes of winterizing your RV would be to insulate the water system against freezing. Here’s how:
- Switch off all tanks of water (fresh, grey and black).
- Switch on the faucets and flush the toilet to empty the rest of the water.
- Removes water lines by using compressed air.
- Insert the RV antifreeze in the pipeline.
It is important to note that the use of RV antifreeze is different compared to automotive antifreeze and it can be utilized in drinking water systems. Take the right quantity based on the manufacture guidelines.
Common Mistakes to Avoid
| Mistake | Description | Potential Consequences |
| Using Automotive Antifreeze | Ethylene glycol or non-RV-safe antifreeze is used instead of propylene glycol RV-safe antifreeze | Toxicity risk, damage to potable water system, unsafe for human use |
| Insufficient Draining | Not fully draining fresh, grey, black tanks, or low-point drains | Water remaining in lines or tanks can freeze and cause cracks or leaks |
| Skipping Low-Point Drains | Leaving low-point drains closed during winterization | Water trapped in low points can freeze and burst pipes |
| Ignoring Appliance Lines | Failing to pump antifreeze through toilets, showers, or exterior faucets | Lines, seals, or valves can freeze and fail |
| Water Heater Mismanagement | Not bypassing water heater or filling it with antifreeze | Waste of antifreeze, potential damage to heater components |
| Neglecting Exterior Protection | Leaving vents, windows, or RV openings unsealed | Cold air can freeze exposed plumbing or tanks; potential for drafts and pest entry |
| Improper Battery Care | Leaving batteries in the RV without charging or removal | Batteries can freeze, lose capacity, or be permanently damaged |
| Fuel System Neglect | Failing to top off fuel or add stabilizer | Condensation and degraded fuel can harm the engine or fuel system |
| Rushing the Process | Skipping steps or not verifying antifreeze coverage | Incomplete protection leading to freeze damage and costly repairs |
| Lack of Inspection | Not checking all systems post-winterization | Missed leaks, unprotected lines, or appliance issues may go unnoticed until spring |
Ready the Engine and the Batteries
RV winter storage requires proper engine and battery maintenance. Take these steps:
- Change the oil and oil filter.
- Test and replenish all fluids.
- Put fuel stabilizer into the tank.
- Unscrew and disassemble batteries and keep in a dry warm place.
In the case of diesel RVs, you should include anti-gel additive to the fuel system which will help in eliminating the thickening of fuel in cold temperatures.
Prices Overview for RVs
India – RV / Motorhome Price Ranges
| Category | Typical Price Range (₹) | Notes |
| Basic Campervan / Conversion | ₹6 lakh – ₹18 lakh | Entry-level van conversions and small camper builds |
| Mid-Range Motorhome | ₹30 lakh – ₹60 lakh | Fully equipped with bathroom, kitchen, AC, domestic amenities |
| Used Motorhomes | ₹6 lakh – ₹80 lakh | Depends on age, condition, conversion quality |
| Luxury / High-End RV | ₹1 crore – ₹3 crore+ | Premium custom builds with high-end finishes |
United States – RV / Motorhome Price Ranges
| RV Type | Typical Price Range (USD) | Notes |
| Towable Trailers | $20,000 – $100,000 | Basic trailers to well-equipped models |
| Class B Camper Vans | $50,000 – $200,000+ | Compact van-style RVs |
| Class C Motorhomes | $80,000 – $250,000+ | Mid-range family RVs |
| Class A Motorhomes | $150,000 – $600,000+ | Large luxury motorhomes |
| Used RVs (Varied Classes) | $30,000 – $250,000+ | Condition, age, and model dependent |
United Kingdom – RV / Motorhome Price Ranges
| Category | Typical Price Range (GBP) | Notes |
| Used Older Campervans | ~£5,000 – £30,000 | Older and simple conversions |
| Entry-Level New Campervans | ~£40,000 – £70,000 | Modern builds or dealer conversions |
| Mid-Range Motorhomes | ~£70,000 – £120,000+ | Coachbuilt and family-oriented units |
| Luxury / Premium RVs | £120,000 – £850,000+ | High-end custom or specialist models (some extreme examples) |
Secure the Inside and the Outside
To store your RV so that you preserve the interior and exterior, you should do the following:
- Seal off all windows, vents and doors.
- Cover the RV with RV covers to avoid UV rays and moisture.
- Insert moisture absorbers in order to prevent mold and mildew.
- Oil door locks and door hinges to avoid freezing.
You should keep your RV in the house or as much as possible under cover to ensure the highest kind of protection.
Tire and Suspension Care
Be sure to check the tires and the suspension system of your RV:
- Check the pressure in tires and inflate them to the required amount.
- Wear tire covers to avoid UV rays.
- In keeping long-term, jack stands can help avoid flat spots.
- Freeze Appliances and Take off Valuables.
Prior to securing up your RV when winter arrives:
- Clean and defrost refrigerator, with open door.
- Take out propane tanks and re-store them.
- Removal of any valuables or electronics that may be destroyed by extreme temperatures.
Spring De-Winterization Process
| Step | Action | Details / Tips |
| 1. Inspect Exterior | Check for damage or leaks | Look for cracked seals, vent covers, skirting issues, and winter-related exterior damage |
| 2. Remove RV Skirting | Take down any insulation or skirting around RV base | Improves airflow and access for spring start-up |
| 3. Reconnect Batteries | Install and charge batteries | Ensure they are fully charged and operational |
| 4. Flush Antifreeze from Lines | Run fresh water through all faucets and drains | Continue until all pink antifreeze is flushed out |
| 5. Sanitize Fresh Water System | Use a bleach solution (1/4 cup bleach per 15 gallons of water) | Run through all faucets, let sit 3–4 hours, then flush thoroughly |
| 6. Refill Fresh Water Tank | Fill with potable water | Ensure system is ready for regular use |
| 7. Test Plumbing & Fixtures | Check faucets, showers, toilets, and exterior outlets | Verify there are no leaks and water flows properly |
| 8. Inspect Water Heater | Reconnect water heater if bypass was installed | Ensure proper operation and no leaks |
| 9. Inspect Grey & Black Tanks | Check valves, drains, and seals | Make sure tanks are fully functional and free from winter damage |
| 10. Test Appliances | Run furnace, refrigerator, and water heater | Ensure all systems work correctly after winter storage |
| 11. Check LP Gas Systems | Inspect propane connections and regulators | Ensure safe operation before use |
| 12. Final Walkthrough | Confirm all systems operational | Ensure RV is ready for spring and summer trips |
Regular Checks During Storage
It should be noted that even when your RV is properly winterized, it is necessary to periodically check on it when it is stored. This will enable you to identify any problem before it gets out of hand and so that all your winterization work is keeping pace.
With these steps on winterizing your RV, you will be set if the cold months come. Keep in mind that proper RV winter storage is a long term investment in your vehicle quality and performance. These RV care tips will make you prepared to go to the road as soon as spring has come and know that your RV was not damaged during the winter.